
Full disclosure: I am not a fan of SharePoint built-in templates. I feel like removing the mockup content is always more time consuming than just creating new pages from scratch. What I do is start with a blank page and go from there. But if you are brand new to SharePoint Online and modern pages, templates are a GREAT way to learn nice looking pages. And once you are comfortable enough, you can build your own! Here are a few quick tips that will make your experience unsuck and how to become a pro at it:
Start with a built-in template. Learn how to use them. And never use them again.
You are presented with three page templates when you create a new page or news post. They are called: Blank, Visual and Basic text.
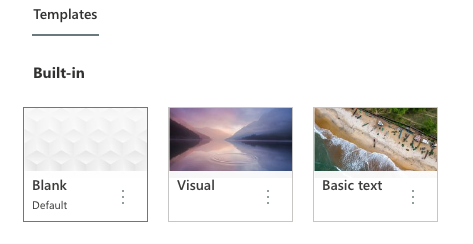
Now remember this: EVERYTHING presented in the Visual or Basic text page templates can also be created by using the Blank template. Think of the other two as the training wheels when you are getting started. So for now, let’s use Basic text as an example:

- Page title: Please give your page a decent (and short) name and try not to use special characters. Everything you first add when you create a page will become that page’s URL.
- Section toolbar: Use it to add new sections, change a section layout, as well as move, copy, and delete them.
- Web part description: If you don’t know what web part was used, hovering it will display that information.
- Add new web part: Here is where the fun really begins. Click on that button to add new web parts. In short, they are blocks of various types of content such as text, images, videos that you can add. You could even create your own! But I will leave that for another post.
Notice in the above example that a page created from a template automatically added images and some web parts for you to fill out. Once you are familiar with they are structured, having to replace and remove content is going to be more time consuming than creating it from scratch. This is the main reason why I only use the blank template unless…
Create your own page templates and save yourself a ton of time
If your SharePoint site requires you to create a ton of similar and repetitive posts, here is a simple (yet kinda pro) tip: create a page template and avoid having to redo some of that work all the time. Say you have a weekly newsletter, or frequent posts that should all look the same and have a standard look and feel. Not only will it save you time but it will also keep work consistent between you and your team. And they will love you for it!
So let’s take an example page I created from blank:
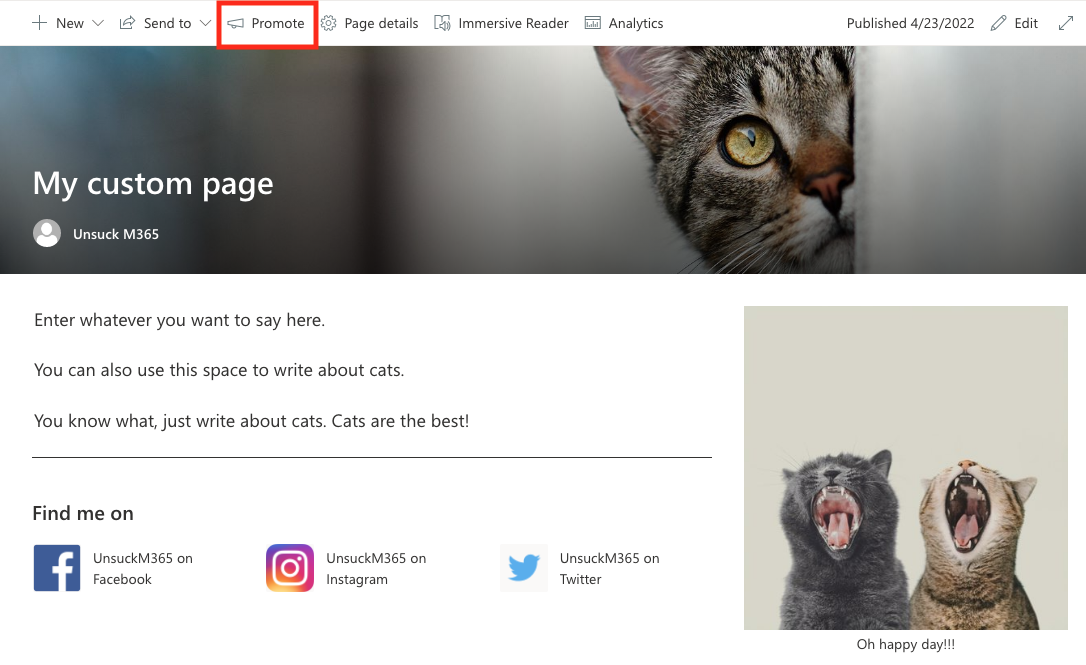
I would like to use the above page as the template for all my upcoming newsletters. All I have to do is look for the button “Promote” in the page’s toolbar – marked with the red rectangle above.
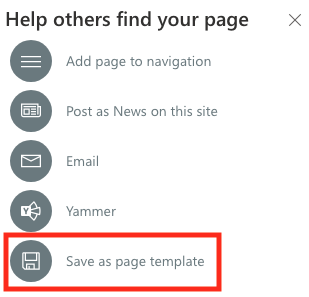
Clicking on promote will display a popup with the following options – and the one you want is, of course “Save as a page template”.
Clicking on the “Save as a page template” button will create a copy of the page (which will be used as your template).
Once the page is created, here are some pro tips to make your life easier:
PRO TIP #1: It is KEY here that you name your new page accordingly by entering a title as I indicated earlier. Since this is a copy of your page, you can also edit out any content that was specific of the source page to make the template a bit more generic.
PRO TIP #2: Clicking on “Template Details” will allow you to give your page a thumbnail, a description and a title for easy identication later.
PRO TIP #3: All page templates are saved in the Pages library, in a folder called Templates. You can also edit templates and remove unnecessary ones from there.
Use your own page templates and make your sites unsuck
After you create and save your page templates, you will see the following next time you create a page:

Worth pointing out that what marked in the screenshot is what you entered when you created the template. You can always edit those later by going back to the pages library:
- Page thumbnail
- Template preview
- Page title
- Page description
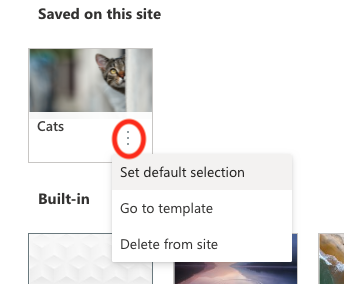
PRO TIP #1: clicking on the the three dots next to the template, allows you to choose one to be selected by default for everyone creating pages for the site, so use that option to ensure everyone knows which template to start with!!
PRO TIP #2: You can also use the same dropdown to delete or go directly to the template if you have any changes to make it.
And that is all. For now. Thanks for reading and happy templating!

[…] upon the design ideas gallery that was introduced with flexible sections. Oh, and guess what? Page templates aren’t a new thing either. What this does however, is expands even further on the templates […]
LikeLike